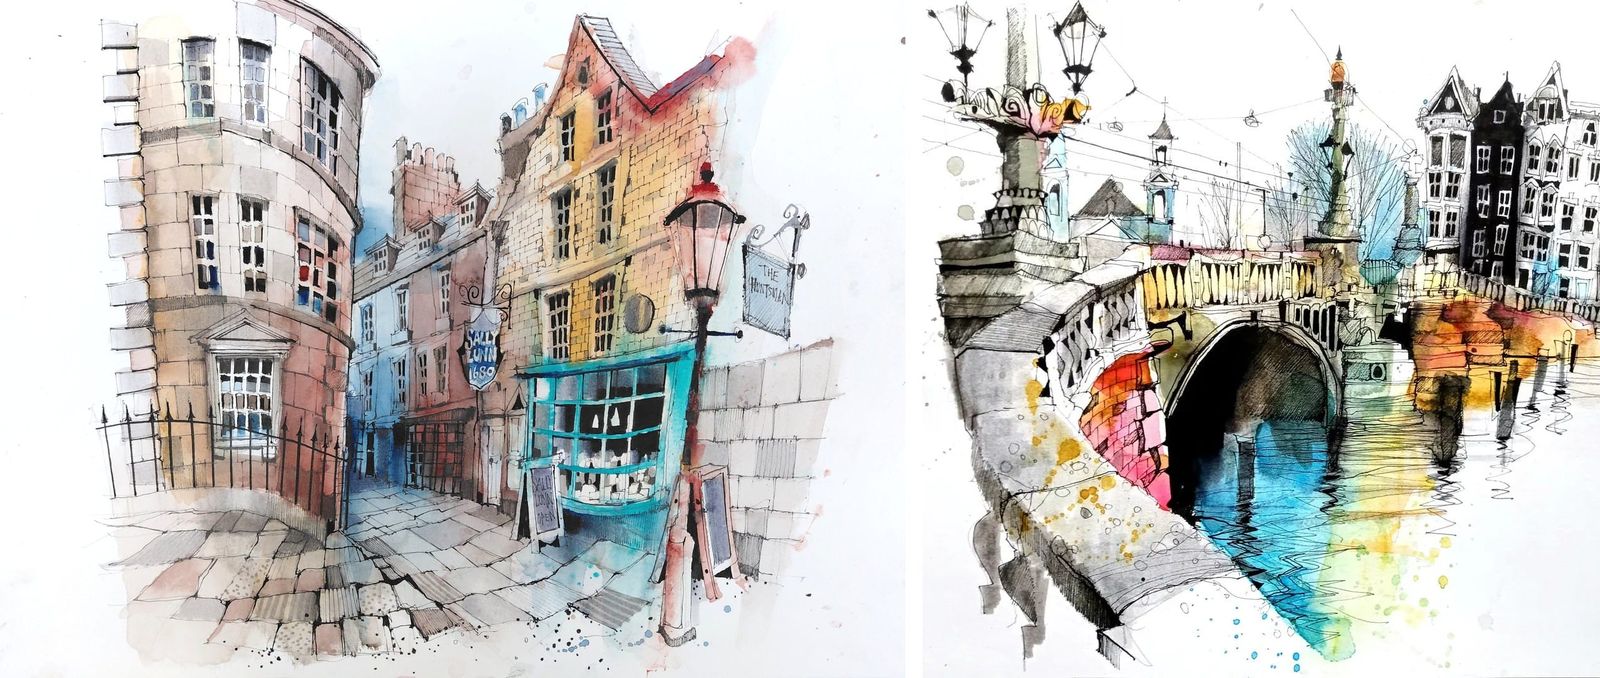
Why mute your colours?
Watercolour straight from the pan is bright. That’s part of the joy of it, but it doesn’t always suit the subject. Paint an old timber-framed house in full-strength colour and it can end up looking like it was built last year.
You can see the difference in a single wall. Sketching in Edinburgh, Ian went back over some of the brickwork with a darker mix of the same two colours he’d used underneath. Same colours, just darker and calmer, and as he put it, “it gives that nice kind of old feel as well.”
On a recent run of old-street sketches, he took that idea right through the whole sketch and set himself a clear aim:
To calm down the colours… to emphasise the cools and the greys and the browns, to really kind of do justice to all the old, you know, wooden beams and the stonework and the brickwork.
There’s an obvious worry with that, though. If you take the brightness out, don’t you just end up with something grey, flat and a bit miserable?
You don’t have to. Most of it comes down to which colours you pick before you start, and a couple of decisions about where they go.
Pick a palette that’s already calm
On these sketches Ian works with four colours, and each one has a job. The one that does the most work in a muted set is the dark. In every set, one of the four is a ready-made dark: Sepia or Indigo.
Sepia, for age. Ian describes it as “a really old, misty kind of colour”, perfect for getting “lots of this kind of dark tonal value, which you see in lots of Tudor buildings.”
He reached for it on a retreat in Bath too, painting the old Sally Lunn’s building, “because it’s so old and such a lot of history.”
Indigo, for shadow and contrast.
Where Sepia is warm and soft, Indigo is cold and deep: “a really dark, dark value” with “a lot of kind of black tones in it.”
He uses it “to give some kind of real sharp contrasts”, like the shadow running down the side of a building.
Mixed with Burnt Sienna and a little white, it also gives him “a real pure rich grey”.
The rest of the set backs the dark up.
A local colour for the materials. Burnt Umber earns its place as “a nice kind of local colour for wood and for kind of old textures.”
A cool to push things back. Cerulean Blue is “perfect for pushing back into the distance to get a great sense of depth.” In another set, Manganese Blue does the same job: “there to push back, to create a sense of depth and space.”
Put those together and the colours are already quiet before a drop of water goes on. As Ian says of one set, “the colours are going to be quite muted with this combination.
Keep one light, bright warm
This is the bit that stops a muted palette going flat.
Sepia and Burnt Umber are warm colours, but they’re dark. So alongside them, every one of these sets has a warm that’s light and bright. In one it’s Indian Yellow:
We don’t want the whole thing to be too monochrome, so that’s where the Indian Yellow comes in.
Its job is small and specific. It gives “little pops of colour and light that we can see in the windows.”
In one of the Indigo sets it’s Gold Ochre, which is “really there just to balance out the temperature.” That set is deliberately heavy, “very, very kind of dark and sombre”, and Ian knows it needs that warm for balance “to get that variety.”
So whatever your muted set is, include one light, bright warm. You’ll use very little of it. It’s there for the few places that need to glow so the rest can stay calm.
Decide where the warm goes before you paint
A warm colour only works if it’s rare. It’s the same thinking behind something Ian says on a beginners’ workshop in Shrewsbury, where he’s mixing a lot of his colours with white:
There’s got to be some parts of your picture which just have the colours kind of standing alone. Because if they’re all mixed… they’re all just going to kind of blend in together. It’ll just be one big mass of the same colour.
One warm doorway in a grey street looks warmer than a whole street of warm colour, because it’s the only one. One lit window in a dark wall is where the eye goes first. A strip of ochre where the sun catches the top of a wall can carry the whole sketch.
So before you start, choose the two or three places that are staying warm. Not afterwards, when you’re trying to rescue something disappointing. Before, while it’s still a decision and not a repair.
Calm a mix with a touch of white
When a mix comes out stronger than he wants, Ian often adds “a little bit of white to calm things down.” It softens and lightens a mix, and it’s how he gets the soft greys and browns he wants for old stonework.
Paint brighter, then calm it down
The last part surprised us most.
When we’re going for a muted look, most of us paint cautiously. Weak mixes, plenty of water, nothing too committed. Ian does the opposite, on purpose:
This is why, in the painting stage, I often go a lot brighter than is absolutely necessary, because I know I’ve got this option now with these light greys to actually make it a little bit duller.
The light grey he means is a brush pen, the Tombow N89. Once the paint is dry, he works it over the sketch “almost throughout the picture to calm the colours down, just to kind of like balance everything out.”
Almost throughout. Not everywhere. Those warm places you chose at the start are the ones he leaves alone.
If you start pale, there’s nothing left to calm. Start bright and the grey has something to work on. No grey brush pen? A thin wash of grey over dry paint will do a similar job, and our guide to warm greys and cool greys shows how to mix one.
What muted doesn’t mean
It doesn’t mean muted is better than bright. A market stall, a harbour full of boats or a shopfront painted red on purpose all want full-strength colour. If what’s in front of you is bright, paint it bright.
It doesn’t mean avoiding browns, either. Sepia, umber, burnt sienna and ochre do a huge amount of work in this kind of sketch.
Try It
For your next old building, build a four-colour set before you start:
- One dark that does the ageing. Sepia for an old, warm dark, or Indigo for a deep, cold one.
- A local colour for the wood, stone or brick.
- A cool to push the distance back.
- One light, bright warm, for the places that should glow.
Pick the two or three places where that warm will go. Paint brighter than feels right, let it dry, then calm everything except those places with a light grey.
Ready to learn more?
If you’d like Ian’s tried-and-tested combinations to hand when you’re picking your four, his Colour Chart Book has over 50 of them. Each one is a set of three to five colours plus white, with colour charts, mixing guides and examples of the combination in his finished sketches. It’s small enough to live in your sketching bag, so the next time you’re standing in front of an old building, the palette’s already sorted.
Did you enjoy this article?
Thanks for your feedback!